
Writing yet another workflow tool for imaging portable media
In 2017 I wrote a blog post on Iromlab (an acronym for “Image and Rip Optical Media Like A Boss”), a custom-built software tool that streamlines imaging and ripping of optical media using an Acronova Nimbie disc robot. The KB has been using Iromlab since 2019 as part of an ongoing effort to preserve the information contained in its vast collection of legacy optical media. This project is expected to reach its completion later this year, but as demonstrated by this earlier inventory, our deposit collection also contains various other types of legacy media that are under threat of becoming inaccessible. Out of these, 3.5 inch floppy disks are the most common data carriers (after optical media), so it made sense to focus on these as a next step.
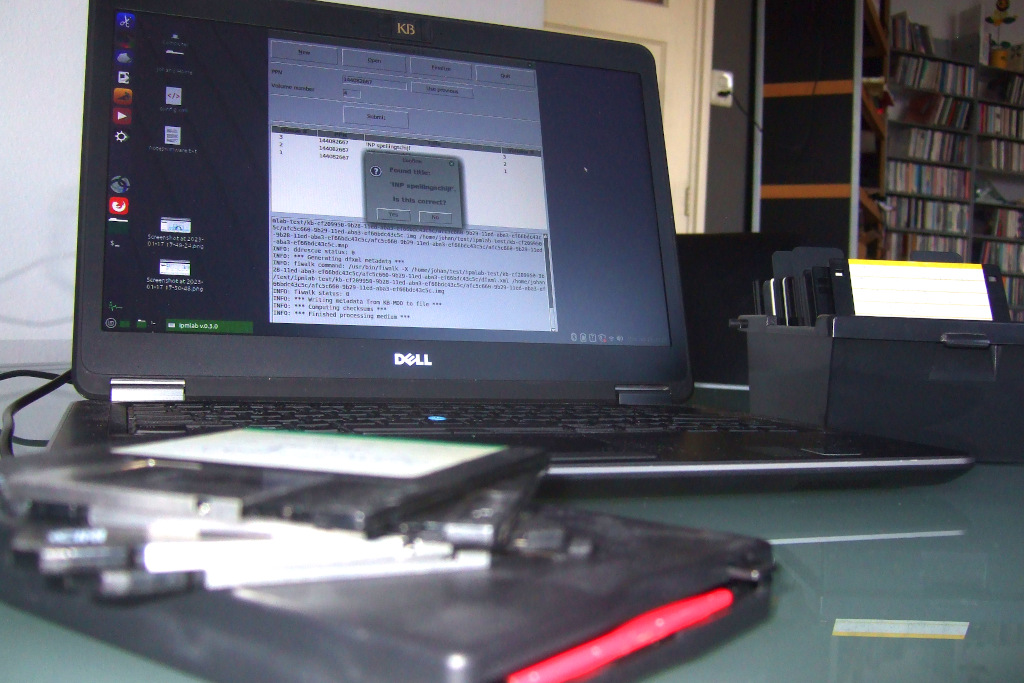
Using the existing Iromlab-based workflow as a starting point, I created a preliminary workflow tool that can be used for imaging our 3.5” floppies (and various other types portable media). In this post I’ll explain how this tool came about, and highlight some of the challenges I encountered during its development.
The plan
Since we already have a workflow in place for optical media, it seemed to make sense to use Iromlab (which uses IsoBuster as the main imaging application) as a starting point. This would allow us to re-use most of the software components of the existing optical media workflow with only minor modifications. It also implied that Windows (10) would be the target platform. So far for the theory, but as we’ll see below, things got slightly more complicated and messy along the way!
Iromlab to Ipmlab
As a first step I forked the existing Iromlab code. Unlike optical media, the possibilities for automating the load and unload process are limited for floppies (although some hackers have successfully repurposed vintage floppy duplicators into DIY autoloaders). So, I started by removing all code that controls the Nimbie disc robot, and adapted the overall worklow accordingly. Next I removed everything that is specific to optical media, and made some small changes to the IsoBuster call, in order to better accommodate 3.5 inch floppies. As all software needs a name, I settled on “Ipmlab” (Image Portable Media Like A Boss). In a twist of irony, the development of Ipmlab wasn’t exactly boss-like, as will become clear from the remainder of this post.
Enter Aaru
Although the tests with an early prototype initially went well, I wasn’t entirely happy with IsoBuster’s behaviour in case of floppies with damaged sectors. Depending on the configuration settings, IsoBuster either requires manual intervention in this case, or alternatively it aborts the imaging process altogether (filling in the missing sectors with placeholder bytes). On Twitter, Robin François suggested the open-source, cross-platform Aaru software as a possible alternative imaging solution. This looked worthy of further exploration. Although I hadn’t used Aaru before, the results of some quick tests looked promising enough, so I added a simple Aaru wrapper module to Ipmlab.
Write blocker woes
This all seemed to work fine at first, but once I connected any of my (external USB) floppy drives1 through a write blocker (Tableau T8u forensic USB Bridge), Aaru would sometimes throw device exceptions.
It’s relevant here to mention that for testing I mostly used some old, DOS-formatted 3.5 inch floppies from my personal collection. These include both “high density” disks with a capacity of 1.44 MB, as well as some older “double density” disks, which can only hold 720 KB worth of data. The main pattern in the Aaru crashes was, that they typically happened whenever I tried to process a “high density” disk after having processed one or more “double density” ones, or vice versa. The crashes didn’t happen when the floppy drives were connected directly to my machine.
Ddrescue tests
To get a better idea what was going on, I ran more tests using an alternative imaging application (Ddrescue), and repeated these tests on another machine with a different operating system (Linux Mint).
I started by imaging one “double density” (720 KB) disk. Any subsequent floppies were typically imaged without problems, provided that these were also “double density” disks. These each resulted in a 737 KB disk image, that I could mount normally on my Linux machine. On the other hand, following up a “double density” disk with a “high density” disk resulted in the following output from Ddrescue:
Press Ctrl-C to interrupt
     ipos:   720896 B
     opos:   720896 B
non-tried:        0 B
  rescued:   737280 B
pct rescued:  100.00%, read errors:        0
This may look normal at first, as ddrescue does not report any errors. On closer inspection though, we see that only 737 KB of data were extracted from the disk. This is unexpected, because a “high density” disk should really result in a 1.5 MB disk image. But the 737 KB value does correspond exactly to the expected size for a “double density” disk! So in spite of the lack of any error messages from Ddrescue, about half of the data on the disks are missing from the image file!
As an additional test I switched off the write blocker, switched it on again, and then repeated the above experiment, but now starting with some “high density” disks. These were all imaged correctly, each resulting in 1.5 MB image files. Following this up with any of my “double density” disks invariably resulted in Ddrescue reporting read errors like this:
pct rescued: 48.88%, read errors: 7372
So apparently Ddrescue expected 1.44 MB of data (the size of the “high density” disk I inserted first), instead of the 720 KB of a “double density” disk. The size of the resulting disk image in this case was 1.5 MB, with the first 737 KB containing the data from the disk, followed by null bytes for the remaining part of the file.
Running Ddrescue on an empty floppy drive resulted in an image with only null bytes (all bad blocks), with an image size of either 737 KB or 1.5 MB, depending on whether a “double” or “high” density floppy had been inserted first.
Repeating any of the above tests with Aaru mostly resulted in Aaru device exceptions. At first sight, this all suggested that the medium size that is exposed by the write blocker to the operating system somehow remains “stuck” to the size of the first floppy that was loaded after switching it on, and isn’t updated afterwards.
Tableau response
I contacted Tableau (the manufacturer of the write blocker) about this, who suggested that the behaviour might be caused by an inability of the write blocker to differentiate between the actual floppy and the USB adapter device. They didn’t envisage a short-term solution for this because of the complexities involved, and advised me to look for some alternative solution that doesn’t use this write blocker.
Windows writing pesky folders
This created a bit of a dilemma. By default, Windows 10 (the target platform for the workflow) automatically tries to write a “System Volume Information” folder to a newly detected floppy disk (or other storage medium for that matter):
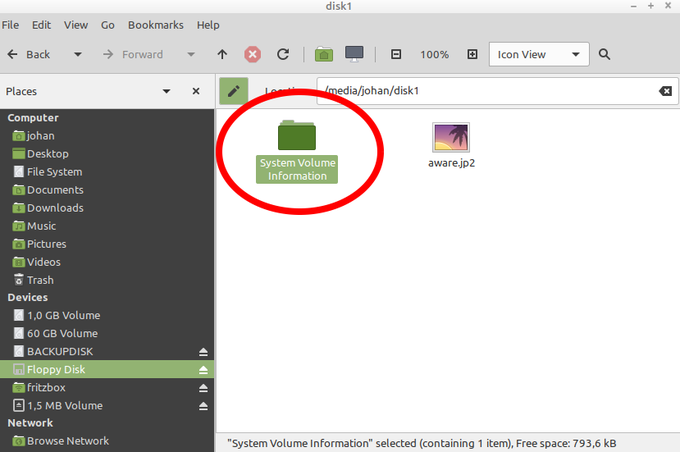
Of course we can prevent this by setting a floppy’s write-protect tab to the “protected” position (which is always a good idea). However, if an operator forgets to do this (and I think it’s reasonable to expect this will happen every once in a while), this would immediately result in changes to the source media. Reportedly it is possible to disable the automatic creation of “System Volume Information” folders, but this involves some rather ugly messing with the Windows registry and the services settings.
Linux to the rescue
After some deliberation with my colleagues on the operational side, we decided to abandon Windows as a target platform, and switch to Linux Mint instead. Unlike Windows, Linux (Mint) doesn’t try to write anything to a floppy upon insertion. For additional protection we can disable automatic mounting of removable media, which is fairly easy to set up. In combination with using a floppy’s write-protect tab, this provides a level of protection against accidental write actions that looks pretty reasonable to me2. Since much of the code was Linux-compatible from the onset, adapting Ipmlab was relatively straightforward.
Return of Ddrescue
As initial tests with the adapted development version of Ipmlab showed no problems, I moved to the final step of packaging the code. Or so I thought. When running the installed version of Ipmlab, Aaru now invariably failed with an unhandled exception. After submitting an issue on this, Aaru’s main developer Natalia Portillo suggested the issue was most likely caused by the console handler class that is used by the current stable (5.3) version of Aaru, and that the latest development version (which uses a different console handler) might give better results. I was able to confirm this with a test with the latest (6.0) development version, which indeed worked without any problems.
However, as there’s still a lot of work to do before a stable 6.0 release will be ready, this again introduced a minor dilemma. In the end, I put my Aaru plans on hold (at least for now), and added a Ddrescue wrapper module to Ipmlab. I then made the imaging application a user-defined configuration variable, giving a user the choice between either Ddrescue or Aaru. This means that once Aaru 6.0 is ready for release, Ipmlab will support it3.
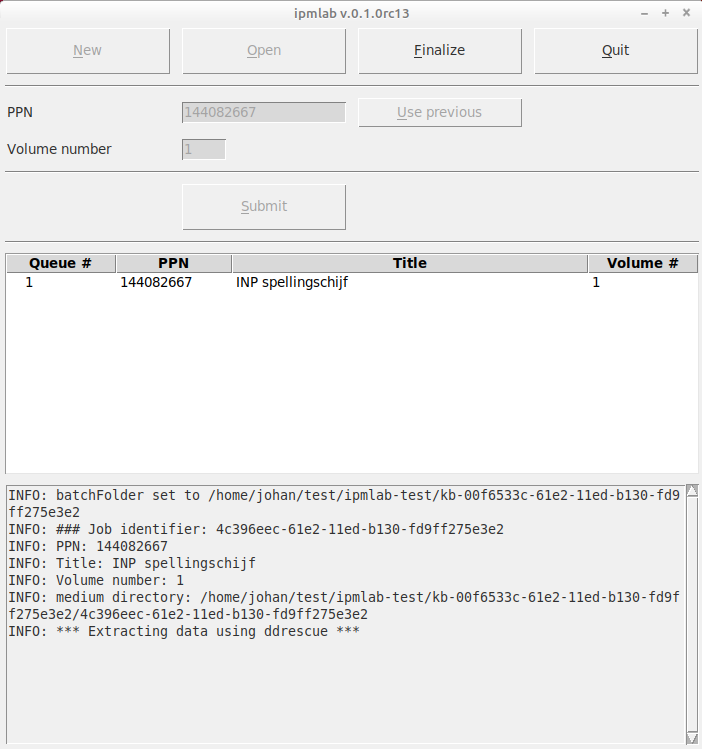
Ipmlab features
Like Iromlab, Ipmlab uses simple a batch structure, where each imaged medium is represented by a single directory that contains the disk image and all associated metadata. This includes:
- a report file in Digital Forensics XML format (created using Sleuth Kit)
- a file with bibliographical metadata
- a Ddrescue map file (only if Ddrescue is used)
- various Aaru-specific metadata files (only if Aaru is used)
- a file with SHA-512 checksums of all of the above files.
Each batch also contains:
- a batch manifest, which is a comma-delimited text file with all information that is needed to process the batch into ingest-ready Submission Information Packages further down the processing chain
- a detailed batch log
- an “end-of-batch” file that indicates that the batch was finalized
- a file that indicates the version of Ipmlab.
Optionally, it’s possible to send some of the user input (PPN identifier or title string) to the corresponding Ipmlab entry widget from an external application through a socket connection. This is useful for integrating Ipmlab with e.g. external administrative applications.
Limitations
At the time I’m writing this post, Ipmlab is still undergoing some further tests by colleagues from our digital preservation department. I expect that the outcome of these will result in some further changes to the software. We don’t currently have any reliable information on the layouts of the 3.5 inch floppies in the KB collection, but I expect these will be mostly DOS/Windows formatted ones. There is still a possibility that further tests reveal a significant proportion of more exotic layouts, such as old Mac-formatted disks. In that case, various changes to the workflow would be needed, as these disk types would require the use of an external hardware controller, and possibly a flux-based imaging approach.
Adapting Ipmlab
Source code and documentation for Ipmlab are available here. Like Iromlab, some features of Ipmlab are quite specific to the situation at the KB. The most obvious example is the use of unique PPN (Pica Production Number) identifiers for each medium, which are linked to records in the KB’s catalog. For a more generic user experience, it’s possible to disable the PPN lookup as a configuration option, which replaces the PPN entry field with a “title” field. The PPN lookup module could also be easily adapted to any other identifier or cataloguing system. Likewise, it’s fairly straightforward to implement alternative disk imaging applications.
Acknowledgments
Thanks are due to Natalia Portillo and Robin François for their help and suggestions on Aaru.
Additional links and resources
-
These are refurbished “old” drives; this is significant, as modern USB floppy drives often cannot read “double density” disks. ↩
-
It’s important to stress that disabling auto-mount does not prevent against intentional write actions: a user can still mount a floppy manually, and write or delete files. ↩
-
Barring any major changes to Aaru’s command-line interface. ↩

Comments